Use Cases: Configure an update policy form using Forms
Before you start
Create a Machine-to-Machine Application with the following scopes enabled:
read:usersupdate:userscreate:usersread:users_app_metadataupdate:users_app_metadatacreate:users_app_metadata
2. Add a Vault connection using the M2M application credentials.
Forms for Actions allows you to create custom privacy policies flows and store the consent under the app_metadata object.
The sections below outline how you can create an Update Policy form using nodes and flows, along with steps for adding your form to a Post Login Action.
Create a form from scratch
Follow these steps to create a form to gather information:
Open the Form editor by selecting Auth0 Dashboard > Actions > Forms.
Select Create Form > Start from scratch.
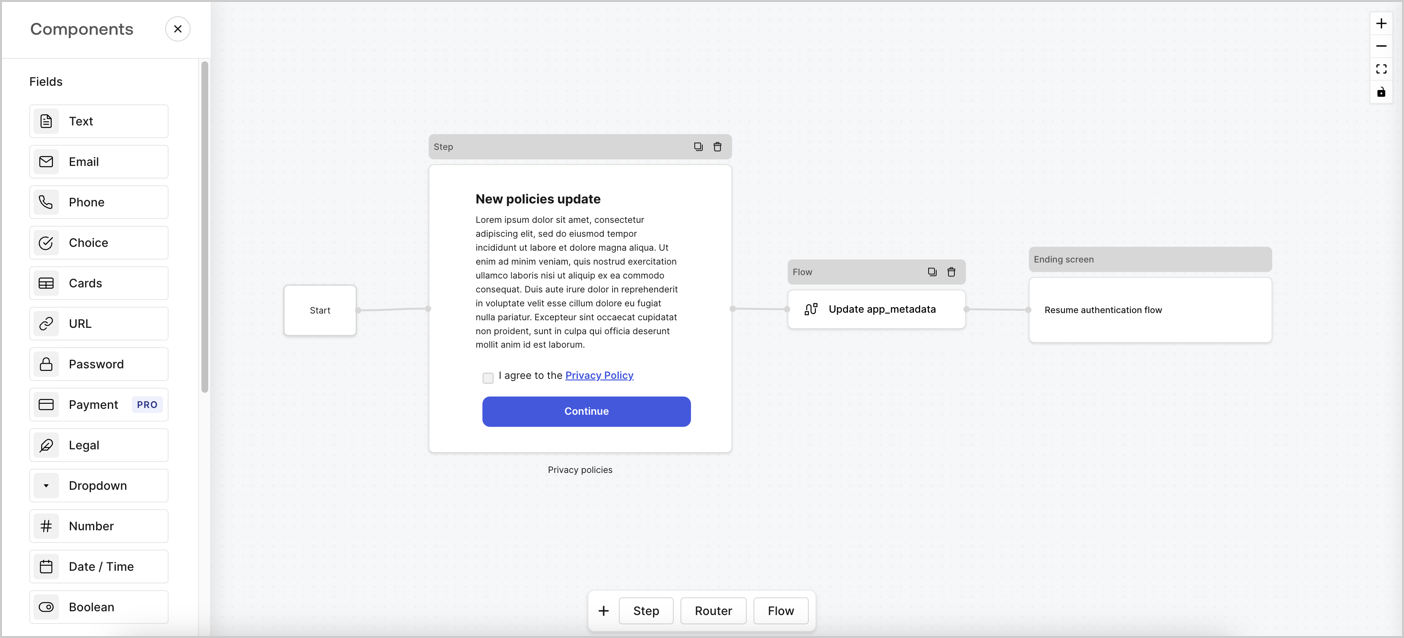
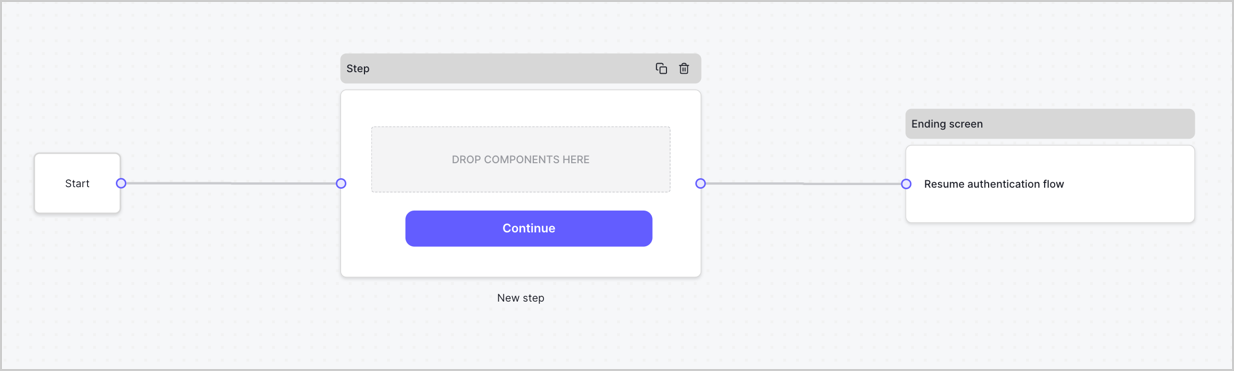
By default, a new form contains a Start node, a Step node, and an Ending screen node.
Configure the Step node
The Step node is the graphical interface visible to users. Add Fields to the Step node to collect the new agreement acceptance value by following these steps:
Drag a Rich text field from the Components menu into the Step node.
Rich text: Enter a description of your privacy policies updates.
Select Save.
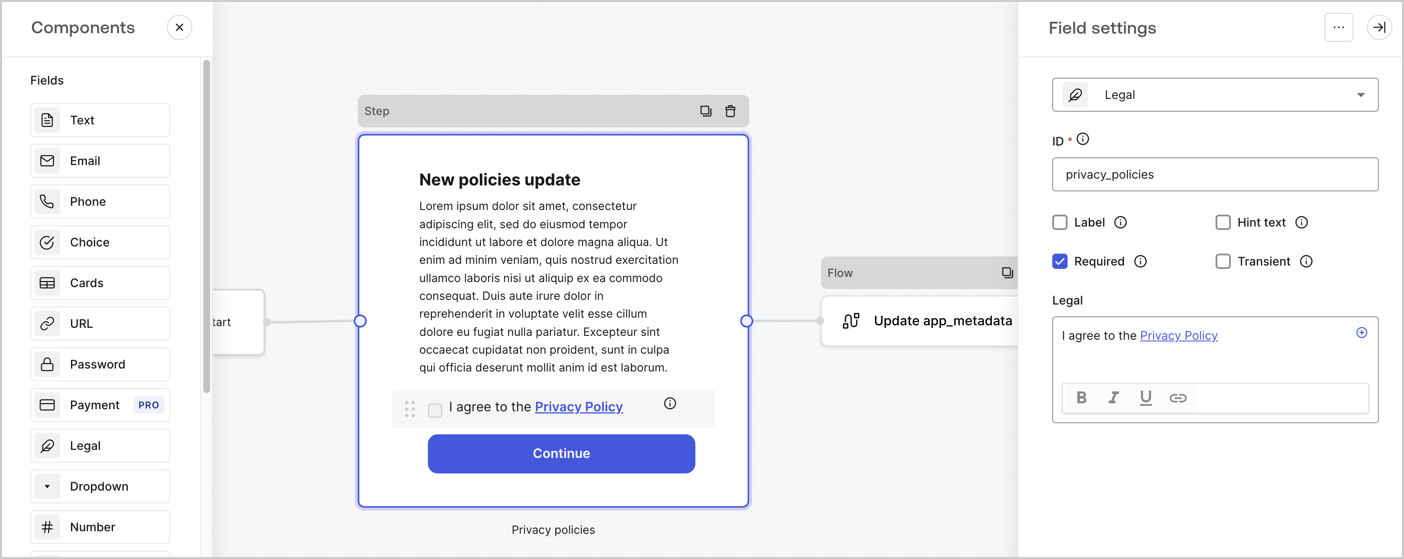
Drag a Legal field into the Step node.
ID: Enter
privacy_policies.Required: Enable the checkbox.
Legal: Enter
I agree to the Privacy Policy.Select Save.
Select Publish to save.
Configure the Flow node
Add a Flow node after the Step node to update the app_metadata and resume the authentication flow by following these steps:
Select Flow from the bottom of the Form editor.
Remove the existing link between the Step and Ending Screen nodes.
Select the new Flow > Click to add a flow > Create a new flow.
Enter
Update app_metadatain the Name field.Select Create.
Select Save.
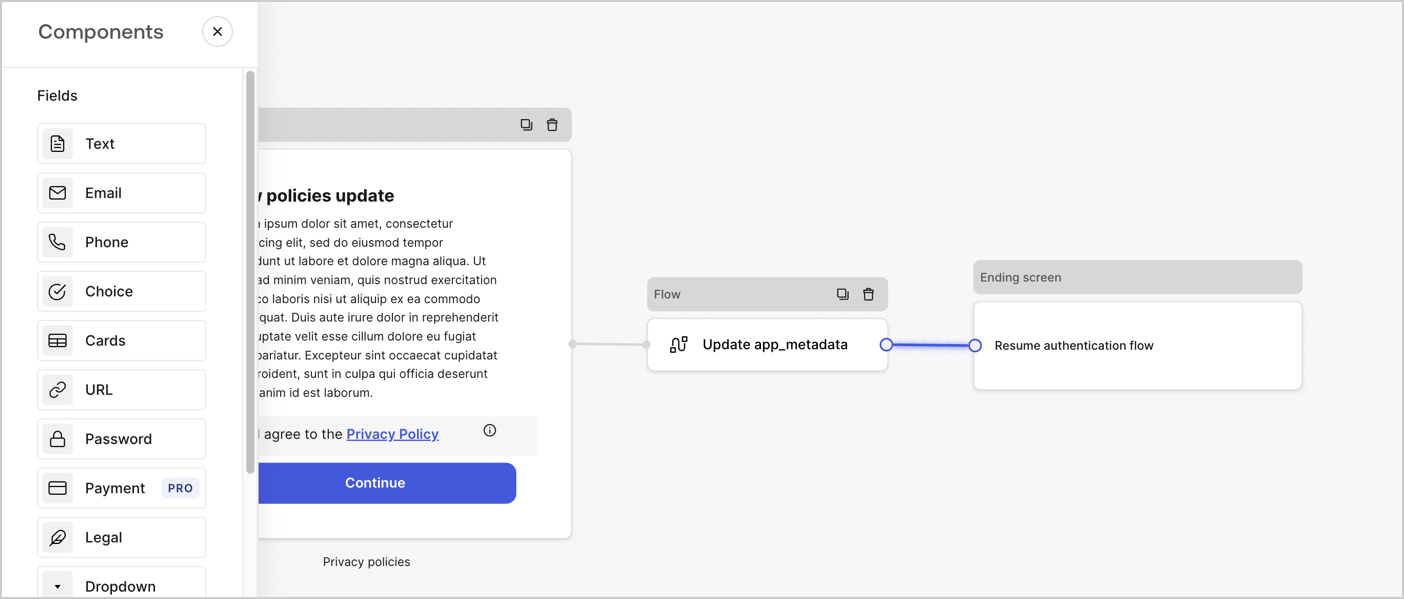
Link the Flow node to the Step and Ending Screen nodes as pictured below.
Select Publish to save.
Add an Auth0 Update user action to the flow by following these steps:
Select the Flow Update app_metadata > Edit flow to open the Flow editor in a new tab.
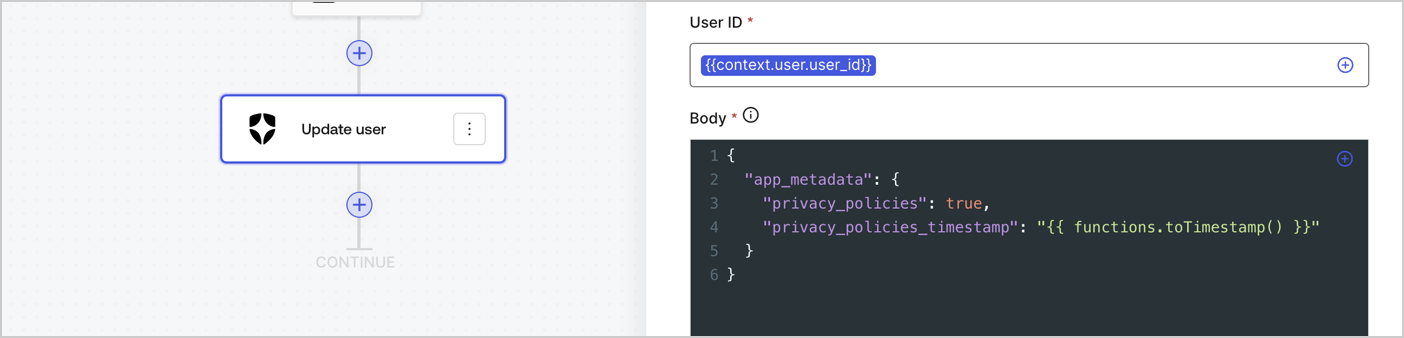
Below the Start Action, select the + icon to add an Update user action. Complete the fields below, then select Save to continue.
Connection: Select from the dropdown the Vault connection to your M2M application.
User ID: Enter
{{context.user.user_id}}.Body: Copy and paste the following code to update the app_metadata with the privacy_policies and privacy_policies_timestamp properties.
{
  "app_metadata": {
    "privacy_policies": true,
    "privacy_policies_timestamp": "{{ functions.toTimestamp() }}"
  }
}
Was this helpful?
/Select Save.
Select Publish to save.
Retrieve the form render code
Retrieve your form render code to visually render the form with a custom Post Login Action by following these steps:
From the Form editor, select <> Render.
Select Copy.
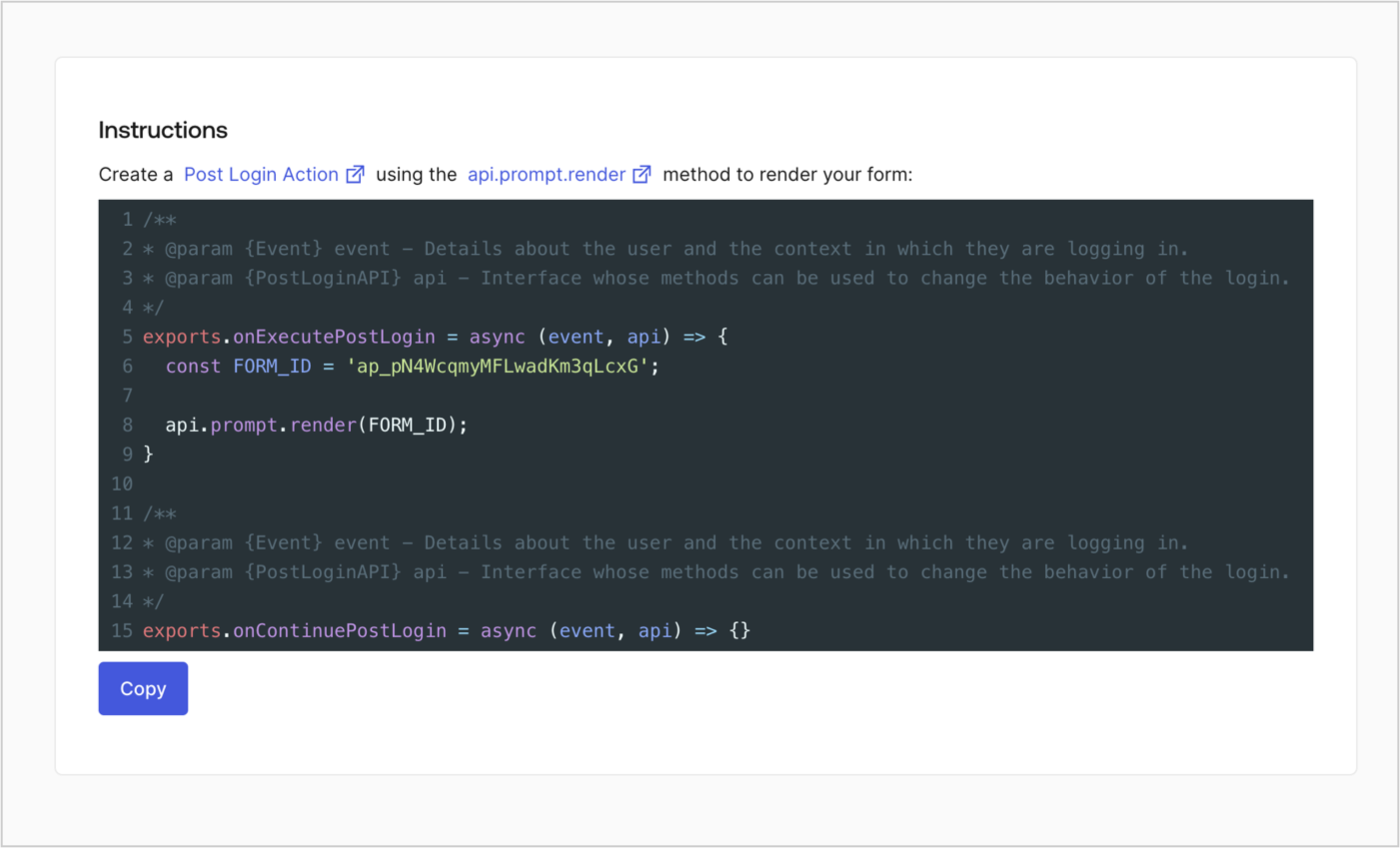
Create a Post Login Action
Create a post-login Action to render your form by following these steps:
Navigate to Auth0 Dashboard > Actions > Flows > Login.
Select the + icon and Select Build from scratch:
Name: Enter
Render Update Policy Form.Trigger: Select
Login / Post Login.Runtime: Select the recommended version.
Select Create.
To configure the post-login Action:
Delete the existing code from the Code editor.
Paste the form render code into the Code editor.
Edit the code to define the conditional logic that will render the form.
/**
* @param {Event} event - Details about the user and the context in which they are logging in.
* @param {PostLoginAPI} api - Interface whose methods can be used to change the behavior of the login.
*/
exports.onExecutePostLogin = async (event, api) => {
  const FORM_ID = 'REPLACE_WITH_YOUR_FORM_ID';

  if (event.user.app_metadata.privacy_policies !== true) {
    api.prompt.render(FORM_ID);
  }
}

exports.onContinuePostLogin = async (event, api) => { }
Was this helpful?
/Select Deploy.
Drag and Drop the Render Update Policy Form Action to the Login flow.
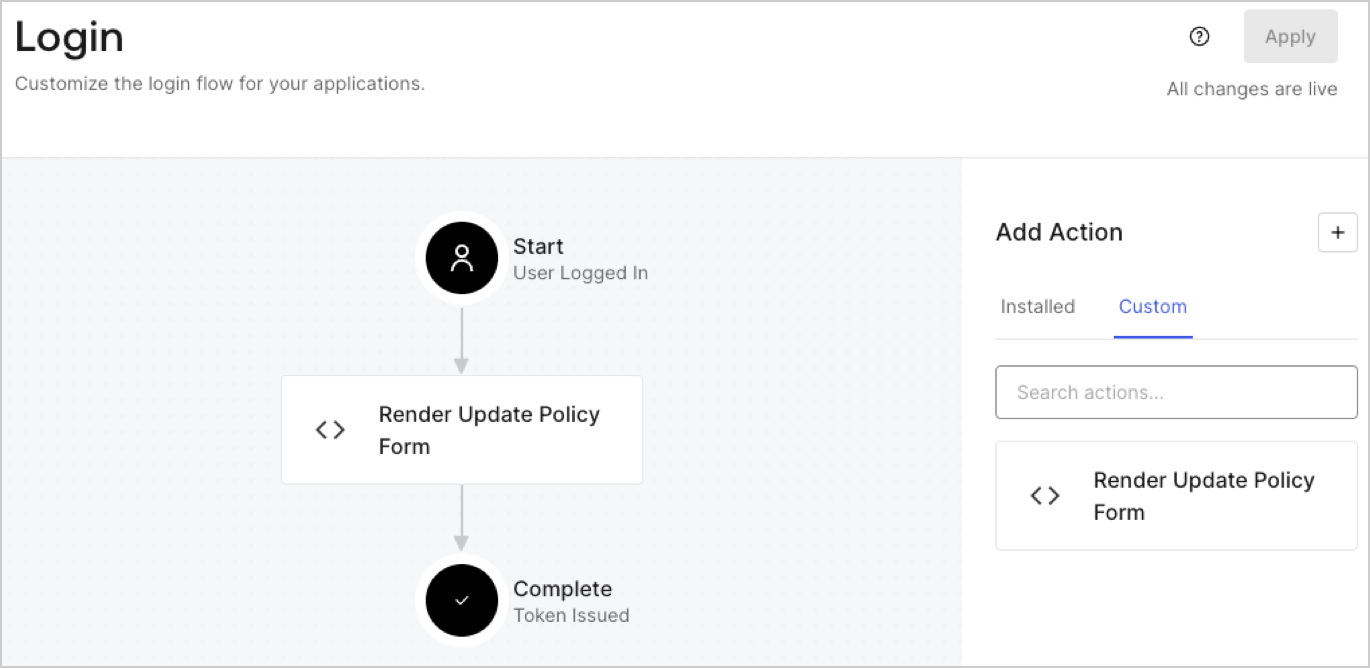
Select Apply.

Test implementation
Test the implementation by following these steps:
Log in with an existing user whose app
_metadataattributeprivacy_policiesdoes not have a value.The post-login Action in the Login flow will render the form and prompt for acceptance.
Select Auth0 Dashboard > User Management > Users, locate the user and verify that the
app_metadataattributeprivacy_policiescontains atruevalue and a timestamp.